Sunday, May 13, 2012

Super Yummy Super Easy Beef Enchiladas


I tend to be snobby about food without being one of those yuppie foodie types that thrive on tiny portions and strange ingredients.  I grew up on basic mid-western meat and potato recipes and alot of Hamburger Helper. We did tacos and enchiladas too and we grilled burgers in the backyard.  I mean, I did grow up in Southern California.  However, it was still super basic stuff without alot of creativity.  If we had Chinese Food, it was take out from a restaurant.  We never attempted Indian food either.  Mostly it was Mexican, basic Italian food like spaghetti with sauce from a dry mix, and standard American food.  I spent several years breaking myself out of that habit after moving away from home.  Andrew and I moved in with the girl that had been my best friend since Junior High.  She introduced me to Curry Chicken and Broccoli Casserole and Shepard's Pie.  They may sound common to alot of you, but we never had anything with curry in it when I was growing up and very rarely did we make one dish meals that weren't soups.

When I first glanced at this recipe, I started to turn my nose up at it, but the little part of me that can read a recipes and know without a doubt if it is worth the effort stopped me and made me reconsider.  It doesn't sound appealing on the surface.  It sounds like more of the quasi-nutritional, cheap meals that I grew up on.  However, the more I learn, experiment with food, and broaden my palate, the more I can look at recipes like this and believe that I can keep it simple and yet improve the quality of the ingredients.  I figure if something is tasty enough, then I will work hard at making it healthier and by healthier, I mean less processed of course.  :P  If I happen to make it healthier by way of less calories and fat, then all the better.  My goal is to actually cook real food with quality ingredients and keep it simple and delicious.

This recipe I found surfing the internet (a typical way you'll find that I "waste time").  I am so glad that my inner voice made me stop and try this recipe.  The flavor is incredible and its super super easy too.  So good, in fact, that I will spend the coming weeks and months trying to improve the quality of ingredients without losing the outstanding flavor. 

All that aside, its cheap, easy and feeds an army.  Kids will love it.  Non-discerning men will love it.  Its perfect for birthday parties and poker games and quick meals after soccer practices and music recitals.  I'm told that its even perfect for smaller families because its freezable.  I have some in the freezer now that I am leaving for my house-sitter while Andrew and I go back home to visit family.  I'll get a review from him, which will probably be one or two words (young men can be so difficult to make talk) and I will try the freezing thing again in the future.

Here are the ingredients for the Super Yummy Super Easy Beef Enchiladas:
1 lb ground beef
1 pkg taco seasoning
14.5 oz can cream of chicken soup
3 cups shredded cheddar cheese, divided
1 cup sour cream
1 pkg enchilada mix
8 oz can tomato sauce
10 burrito sized flour tortillas

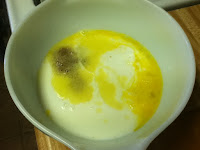
Preheat oven to 350F.  In a small saucepan, follow the directions on the package of enchilada sauce. If you have a favorite enchilada sauce that is "already cooked" (an inside joke just for Andrew) then by all means, use that instead of the package mix and tomato sauce.  McCormick is the one I like best for now until I can talk my friends who own Enrique's in Long Beach, California to share their recipe for enchilada sauce.  Their cheese enchiladas are out of this world!  In the meantime, combine the sour cream, combine cream of chicken soup, taco seasoning and 2 c cheese in a medium/large bowl.
Cook the ground beef until crumbled and done.  Drain/discard grease.  Add the ground beef to the bowl and combine. 
Warm the tortillas in the microwave just long enough to be pliable, about 30 seconds.  Fill each tortilla with about  a 1/2 cup of beef/cheese mixture.  Fold each end over and roll into a burrito.  Place seam side down in two square or one 9x13 baking dishes coated with non-stick cooking spray.  Cover with the enchilada sauce and top with remaining cup of cheese.  

Cover with foil and bake for 40 minutes.  Uncover the last 10 minutes.  Serve one with re-fried beans and/or Spanish rice.  I will post the freezing instructions later after I update the recipe and do some more testing.  For now, enjoy these incredible enchiladas exactly how they are.

Love and Laughter

Sunday, May 6, 2012

Cinnamon Scones

Here is your bonus recipe for being such patient readers!

Cinnamon Scones

The problem with 99% of all the scones I have ever tried were that they were dry and crumbly.  This is *not* how a scone should be.  They should be moist enough not to *need* a glass of milk to go with it.  Of course, a glass of milk is also the perfect accompaniment.  These scones were really yummy and still moist.  


Combine the flour, oatmeal, sugar, baking powder and salt.  Cut up a stick of butter into cubes and add to the flour mixture.  

Using a pastry cutter, cut the butter into the flour mixture until it resembles coarse crumbs.  In a separate bowl, combine the milk, egg and vanilla.  Add to the dry ingredients.  Mix carefully until all the dry ingredients are just moistened.  
In another small bowl, combine more sugar and cinnamon.  Toss over the dough and gently cut it into it until there is none left in the bottom of the bowl.  
Using an ice cream scoop, measure out about 12 scones (mine were a little big and only made 11).  Place them on a cookie sheet lined with parchment paper.  Bake in the center of your oven for about 12 minutes at 425F. Let cool for about 5 minutes.
In a small bowl (I re-used the one from the cinnamon sugar), combine about a cup of powdered sugar with a good pour of vanilla and stir.  Warm about 3 tablespoons of cream cheese in the microwave for about 30 seconds.  Stir it to the powdered sugar.  Add enough milk until your glaze falls off your spoon in a little stream.  Drizzle over the scones by carefully (and quickly) moving your spoon back and forth over the scones.

Serve warm with other breakfast items.  Coffee would have been so perfect this morning but, alas, I am the only coffee drinker in the house and its a waste for me to make a whole pot.

Cinnamon Scones

2 c AP (all purpose) flour
1 c oatmeal
1/2 c sugar, divided
1 Tbsp baking powder
1/4 tsp salt
1 stick butter
3/4 c milk
1 egg
1-2 tsp vanilla
2 tsp cinnamon
1 cup powdered sugar
1 tsp vanilla
3 Tbsp cream cheese
splash of milk


Combine the flour, oatmeal, sugar, baking powder and salt.  Cut up a stick of butter into cubes and add to the flour mixture. Using a pastry cutter, cut the butter into the flour mixture until it resembles coarse crumbs.  In a separate bowl, combine the milk, egg and vanilla.  Add to the dry ingredients.  Mix carefully until all the dry ingredients are just moistened.  In small bowl, combine more sugar and cinnamon.  Toss over the dough and gently cut it into it until there is none left in the bottom of the bowl.  Using an ice cream scoop, measure out about 12 scones (mine were a little big and only made 11).  Place them on a cookie sheet lined with parchment paper.  Bake in the center of your oven for about 12 minutes at 425F. Let cool for a couple of minutes.  In a small bowl, combine about a cup of powdered sugar with some vanilla and stir.  Warm about 3 tablespoons of cream cheese in the microwave for about 30 seconds.  Stir it to the powdered sugar.  Add enough milk so that your glaze falls off your spoon in a little stream.  Drizzle over the scones by carefully (and quickly) moving your spoon back and forth over the scones.  Serve warm with other breakfast items.  

Enjoy!

Love and Laughter

Real Simple Buttermilk Pancakes


Life moves pretty fast.  If you don't stop and look around once in a while, you could miss it. ~ Ferris Bueller

The theme in my life lately has been big wonderful promises that seem too good to be true.  In time, like all things too good to be true, the truth emerges eventually.  Thankfully, things are still good and there are still blessings in my life.
A few years ago I decided to go back to school.  I wasn't mature enough for college when I was younger.  I gave it a try and quickly dropped most of my classes.  Why go to an Intro to Business class when I could go to the airport and watch the airplanes take off and land?  (I am a dreamer)  Andrew was starting his senior year in high school, so I started at the local community college.  I worked full time and took three classes each fall and spring semester.  I was able to cram five classes in each summer due to being laid off twice in two years.  It was either a tough break or a blessing in disguise, depending on how you looked at it.  I took advantage of the opportunity and completed my AA degree in two years with a 3.76 GPA.  I see it as a blessing to have been laid off now.
After completing my degree (and having run out of savings), I started work again six weeks later.  I knew I wanted to continue with my schooling and get a Bachelors but I needed a break from school.  It took less than one full semester for me to get bored and want to be in school again.  During the holiday season, I gathered what I needed and applied to the University of New Mexico.  I was accepted into the Psychology program and start this fall.
I was awarded a scholarship renewable for 4 semesters and a couple of smaller grants from the university and the state.  I called the school and was told the requirements for the scholarship would be to take and complete 12 units per semester.  ~sighs~  We'll make it work, I thought.  I can handle four classes.  Then I find out its actually 15 units.  What????  Ugh!  Could I work a full time 8a-5p M-F job and take five classes each semester?  I don't *need* the scholarship I suppose.  It sure would have made things alot easier though.
Orientation was this past week.  I'm officially registered... for five classes.  I don't know what I am thinking, but I am going to give it a try.  I have decided that if in the first three weeks I think I can handle five classes, I will take that scholarship money and put it into a savings account just in case it doesn't work out and I need to pay it back.  If it works, then winter break and the holidays are spent at home with family.  That is motivation for me!
What does any of this have to do with food?  Well, I have two recipes for you today (your bonus for reading all of that).  These recipes are cheap and comforting (everything I will need for the year to come) and not perfect (much like the blessings in my life).
Here is the first one:

Real Buttermilk Pancakes


In a large bowl, beat the egg lightly. Add the buttermilk, melted butter and vanilla. Mix well.
       

Add the dry ingredients and mix until it just comes together. Do not over-mix. It is a very thick batter. Spray a pan with non-stick cooking spray. Ladle the batter into the pan.


Cook over low-medium heat. Like the good little home cook that I am, I kept looking for the bubbles. None ever came. Just keep cooking over that low-medium heat for longer than you think it should take. Keep an eye on how brown the bottom gets. Flip and cook several more minutes.


I made these pancakes over several weekends trying to make the little bubbles show up. They were gummy and lacking that yummy tangy buttermilk flavor. Those first pancakes didn't bubble because they were so thick but oh my were they yummy! Andrew had his with maple syrup that first time and I had mine with powdered sugar. In yesterday's attempt, we had strawberry jam. I'm a huge fan of butter, but these pancakes seriously do not need the added butter. They are truly amazing.

Real Simple Buttermilk Pancakes

1 ½ cups all purpose flour
1 tbsp baking powder
1 tsp salt
¼ cup white sugar
1 ½ cups buttermilk
1 egg
4 tbsp butter, melted and cooled
1 tsp vanilla extract

In a large bowl, beat the egg lightly. Add the buttermilk, melted butter and vanilla. Mix well. Add the dry ingredients and mix until it just comes together. Do not over-mix. It is a very thick batter. Spray a pan with non-stick cooking spray. Ladle the batter into the pan. Cook over low-medium heat. Like the good little home cook that I am, I kept looking for the bubbles. None ever came. Just keep cooking over that low-medium heat for longer than you think it should take. Keep an eye on how brown the bottom gets. Flip and cook several more minutes until done. Top with your favorite toppings. No need for extra butter.

There is another one coming a little later!

Love and Laughter